
JINIers
220510_Streaming IoT Data to Cloud Storage 본문
220510_Streaming IoT Data to Cloud Storage
IoT 데이터를 Cloud Storage로 스트리밍
개요
cloud iot core 및 cloud pub/sub 구성하여 디바이스에서 스트리밍 데이터 수집
목표
1. cloud pub/sub 주제 및 구독 만들기
2. iot core를 사용하여 레지스트리 만들기
3. 시뮬레이터에서 MQTT 애플리케이션 시작
4. cloud storage로 데이터 스트리밍
1. cloud pub/sub 설정 및 주제
pub/sub > topic > create topic
- topic id : iotlab
2. 주제권한 설정
add principal >
- topic member : cloud-iot@system.gserviceaccount.com
- role : pub/sub publisher
3. 데이터 저장위치 생성
cloud storage > browser > create bucket
- name : iotstorage1
기타 다른 설정 하지 않고 create
만들어진 bucket > create folder >
- name : Sensor-Data
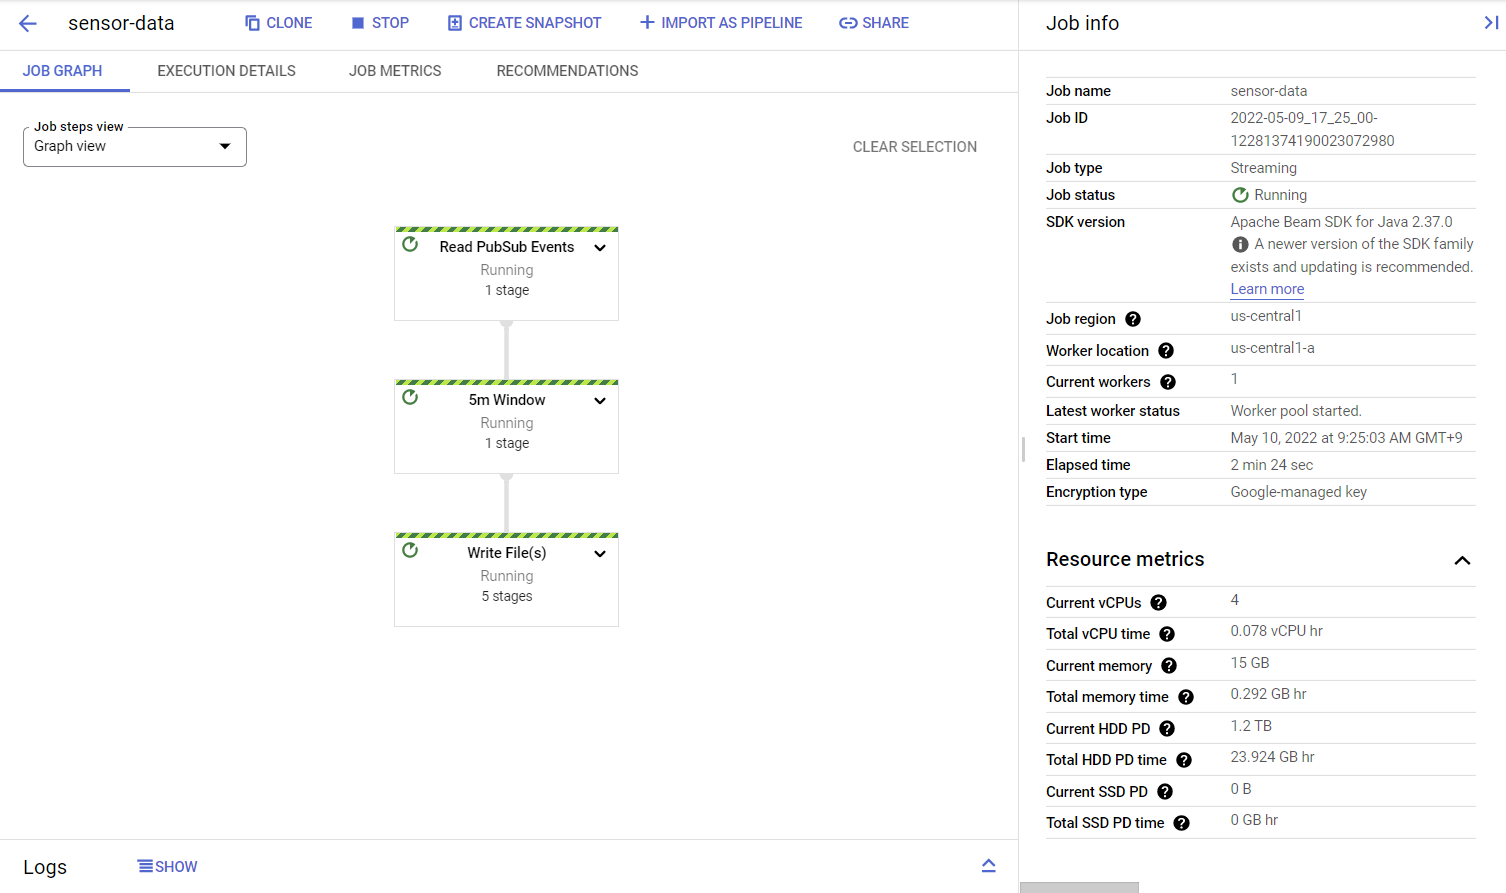
4. dataflow 작업시작
dataflow > create job from template > 설정 > run job
- job name : sensor-data
- regional : us-central1
- dataflow template : Pub/Sub to Text Files on Cloud Storage
- Input Pub/Sub topic : : projects/qwiklabs-gcp-01-0b276fd261f0/topics/iotlab
- Output file directory in Cloud Storage : gs://iotstorage1/Sensor-Data/
- Output filename prefix : output-
- Temporary Location : gs://iotstorage1/tmp
5. compute engine vm 준비
compute engine > vm instance > iot-device-simulator ssh >
[google cloud SDK 설치 제거]
sudo apt-get remove google-cloud-sdk -y
[최신버전 google cloud SDK 설치]
curl https://sdk.cloud.google.com | bash
ssh 종료 후 다른 ssh 켜기
[SDK 구성요소 최신상태 확인]
gcloud components update


y
[베타 구성요소 설치]
gcloud components install beta
[리포지토리 업뎃]
sudo apt-get update
[필수 sw 패키지 설치 확인]
sudo apt-get install python3-pip openssl git -y
[python 구성요소 추가]
sudo pip3 install pyjwt paho-mqtt cryptography
[분석데이터 추가]
git clone http://github.com/GoogleCloudPlatform/training-data-analyst
[iot-device-simulator vm instance의 ssh 세션에서 변수지정]
export PROJECT_ID=qwiklabs-gcp-01-0b276fd261f0
export MY_REGION=us-central1
6. 오픈 iot 코어
iot core > create registry > create
- registry id : iotlab-registry
- region : us-central1
- Select a Cloud Pub/Sub topic : projects/qwiklabs-gcp-01-0b276fd261f0/topics/iotlab
7. 암호화 키 쌍 생성
iot-device-simulator ssh 접속
[암호화 키 쌍 생성]
cd $HOME/training-data-analyst/quests/iotlab/
openssl req -x509 -newkey rsa:2048 -keyout rsa_private.pem \
    -nodes -out rsa_cert.pem -subj "/CN=unused"
cat rsa_cert.pem
[장치를 만들고 레지스트리에 추가]
iot core > device > 레지스트리 id 확인 : iotlab-registry > create a device(2개 생성)
- Device ID : temp-sensor-buenos-aires / temp-sensor-istanbul
- Authentication : Enter manually
- Public key format : RS256_X509
- Public key value : 복사한 인증서 붙여넣기


8. 시뮬레이션된 장치 실행
iot-device-simulator ssh로 접속해서 실행
[CA 루트인증서 다운로드]
cd $HOME/training-data-analyst/quests/iotlab/
curl -LO https://pki.google.com/roots.pem
[첫번째 시뮬레이션된 장치 백그라운드에서 계속 실행]
python3 cloudiot_mqtt_example_json.py \
   --project_id=$PROJECT_ID \
   --cloud_region=$MY_REGION \
   --registry_id=iotlab-registry \
   --device_id=temp-sensor-buenos-aires \
   --private_key_file=rsa_private.pem \
   --message_type=event \
   --algorithm=RS256 --num_messages=200 > buenos-aires-log.txt 2>&1 &
[두번째 시뮬레이션된 장치 실행]
python3 cloudiot_mqtt_example_json.py \
   --project_id=$PROJECT_ID \
   --cloud_region=$MY_REGION \
   --registry_id=iotlab-registry \
   --device_id=temp-sensor-istanbul \
   --private_key_file=rsa_private.pem \
   --message_type=event \
   --algorithm=RS256 \
   --num_messages=200
[저장된 데이터 검사]
cloud storage > 버킷 클릭 > Sensor-Data 폴더선택 > 폴더가 비어있으면 5~10분 기다렸다가 버킷 새로고침 클릭 > 파일 내용 확인

9. dataflow 작업 중지
dataflow > 생성한 dataflow 클릭 > stop > drain / stop job


'GCP > Qwiklabs' 카테고리의 다른 글
| 220524_Analyzing Natality Data Using Vertex AI and BigQuery (0) | 2022.05.24 |
|---|---|
| 220520_Vertex AI Platform: Qwik Start (0) | 2022.05.20 |
| Building and Deploying Machine Learning Solutions with Vertex AI: Challenge Lab (0) | 2022.05.04 |
| Building an IoT Analytics Pipeline on Google Cloud (0) | 2022.05.02 |
| Building and Deploying Machine Learning Solutions with Vertex AI: Challenge Lab (0) | 2022.04.28 |


